Want to control your modular synth with your turntable? Of course you do…
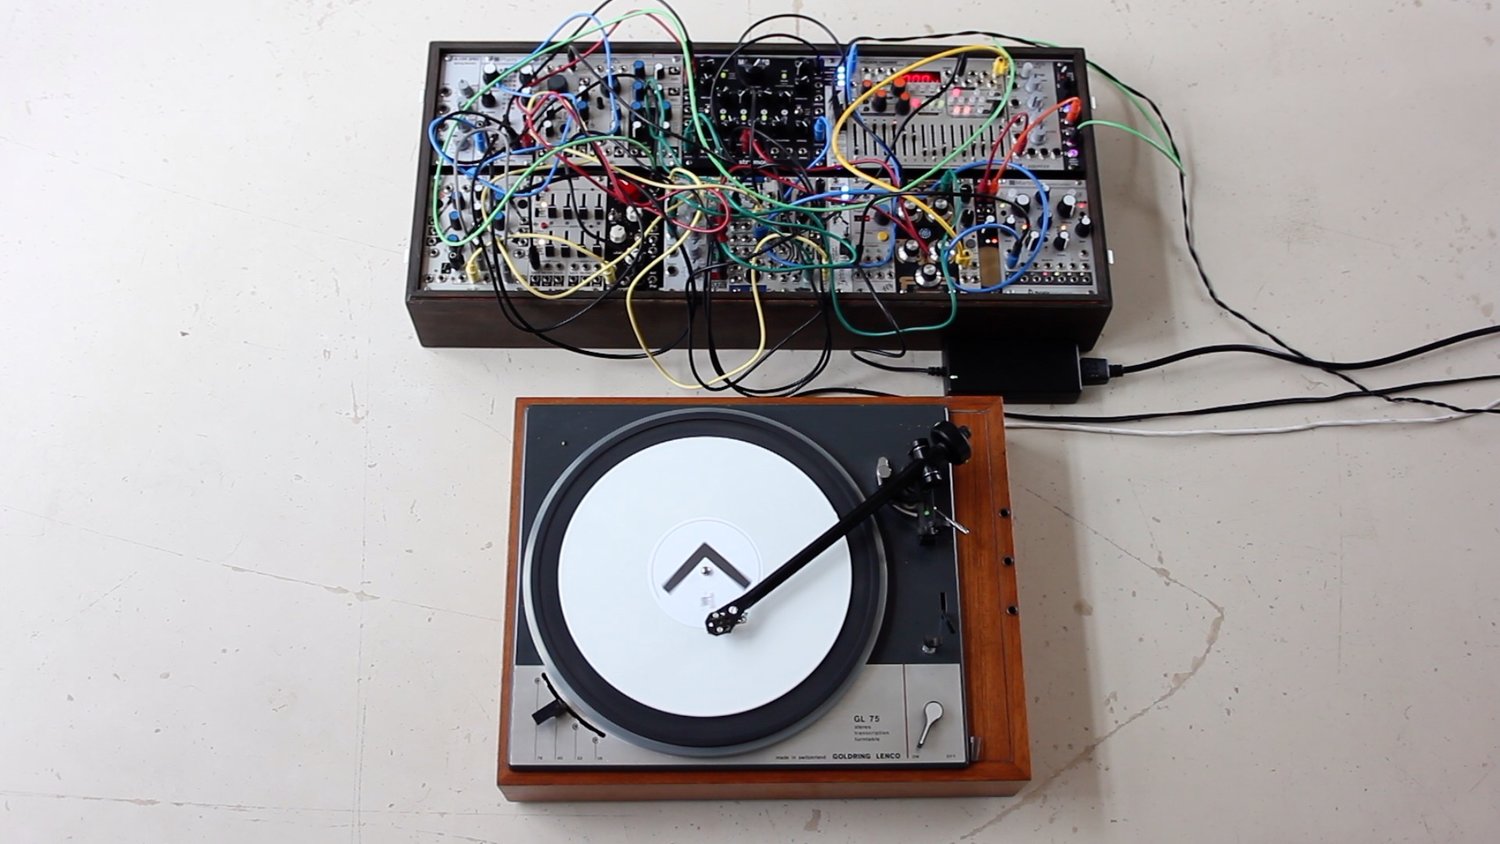
An impressive Arduino project by Lomond Campbell does just that. With a few components and a simple bit of coding on your Arduino unit, you can control your modular synths. From controlling the tempo of your Eurorack modular with your turntable speed control to sampling in real-time from a record while staying in sync, all while making your live modular set more visually appealing with this clever turntable hack.
You’ll need proximity switches and an Arduino to make this modular turntable 4 channel sequencer. Adding toggle switches enable you to switch each channel and mute – great for modular performances.
Components you’ll need for your Modular Turntable Controller:
- Arduino Nano
- Proximity switches / reed switches x4
- 10K resistors x4
- 3.5mm mono jacks x4
- LEDs (optional) x4
- 100 Ohm resistors (optional) x4
- SPDT toggle switches (optional) x4
- Veroboard
- Turntable (Preferably a variable speed turntable)
Copy the code below, compile, and upload it to your Arduino. Check out the schematics on Lomdon’s website for the veroboard diagram, then solder together.
Programmable Rotary Gate Sequencer for Modular Code:
// WVN005 TURNTABLE GATE SEQUENCER
// LOMOND CAMPBELL 2019
const int AbuttonPin = 8;     // the number of the proximity switch pin
const int AledPin =  12;      // the number of the LED pin
const int AgatePin =  4;      // the number of the gate output pin
const int BbuttonPin = 7;     // the number of the proximity switch pin
const int BledPin =  11;      // the number of the LED pin
const int BgatePin =  3;      // the number of the gate output pin
const int CbuttonPin = 6;     // the number of the proximity switch pin
const int CledPin =  10;      // the number of the LED pin
const int CgatePin =  2;      // the number of the gate output pin
const int DbuttonPin = 5;     // the number of the proximity switch pin
const int DledPin =  9;      // the number of the LED pin
const int DgatePin =  13;      // the number of the gate output pin
// variables will change:
int AbuttonState = 0;         // variable for reading the proximity switch status
int BbuttonState = 0;         // variable for reading the proximity switch status
int CbuttonState = 0;         // variable for reading the proximity switch status
int DbuttonState = 0;         // variable for reading the proximity switch status
void setup() {
  // initialize the LED pin as an output:
  pinMode(AledPin, OUTPUT);
  // initialize the proximity switch pin as an input:
  pinMode(AbuttonPin, INPUT);
   // initialize the gate output pin as an output:
  pinMode(AgatePin, OUTPUT);

   // initialize the LED pin as an output:
  pinMode(BledPin, OUTPUT);
  // initialize the proximity switch pin as an input:
  pinMode(BbuttonPin, INPUT);
    // initialize the gate output pin as an output:
  pinMode(BgatePin, OUTPUT);

     // initialize the LED pin as an output:
  pinMode(CledPin, OUTPUT);
  // initialize the proximity switch pin as an input:
  pinMode(CbuttonPin, INPUT);
     // initialize the gate output pin as an output:
  pinMode(CgatePin, OUTPUT);

       // initialize the LED pin as an output:
  pinMode(DledPin, OUTPUT);
  // initialize the proximity switch pin as an input:
  pinMode(DbuttonPin, INPUT);
     // initialize the gate output pin as an output:
  pinMode(DgatePin, OUTPUT);


}
void loop(){
  // read the state of the proximity switch value:
  AbuttonState = digitalRead(AbuttonPin);
 // read the state of the proximity switch value:
  BbuttonState = digitalRead(BbuttonPin);
   // read the state of the proximity switch value:
  CbuttonState = digitalRead(CbuttonPin);
     // read the state of the proximity switch value:
  DbuttonState = digitalRead(DbuttonPin);
  // check if the proximity switch has closed.
  // if it has, the buttonState is HIGH:
  if (AbuttonState == HIGH) {
    // turn LED on:
    digitalWrite(AledPin, HIGH);
        // send gate high:
     digitalWrite(AgatePin, HIGH);
  }
  else {
    // turn LED off:
    digitalWrite(AledPin, LOW);
      // send gate low:
    digitalWrite(AgatePin, LOW);
  }

    // check if the proximity switch has closed.
  // if it has, the buttonState is HIGH:
  if (BbuttonState == HIGH) {
    // turn LED on:
    digitalWrite(BledPin, HIGH);
        // send gate high:
    digitalWrite(BgatePin, HIGH);
  }
  else {
    // turn LED off:
    digitalWrite(BledPin, LOW);
       // send gate low:
    digitalWrite(BgatePin, LOW);
  }

    // check if the proximity switch has closed.
  // if it has, the buttonState is HIGH:
  if (CbuttonState == HIGH) {
    // turn LED on:
    digitalWrite(CledPin, HIGH);
     // send gate high:
    digitalWrite(CgatePin, HIGH);
  }
  else {
    // turn LED off:
    digitalWrite(CledPin, LOW);
        // send gate low:
    digitalWrite(CgatePin, LOW);
  }

    // check if the proximity switch has closed.
  // if it has, the buttonState is HIGH:
  if (DbuttonState == HIGH) {
    // turn LED on:
    digitalWrite(DledPin, HIGH);
      // send gate high
    digitalWrite(DgatePin, HIGH);
  }
  else {
    // turn LED off:
    digitalWrite(DledPin, LOW);
        // send gate low:
    digitalWrite(DgatePin, LOW);
  }
}
Check out Lomdon’s Bandcamp for his music – including a very cool one-take track recorded live using an acoustic robot drum kit and the Elektron Octatrack MkII.
Where it’s at – Add a second turntable and you can beatmatch/mix sequencers with two turntables – “I’ve got two turntables and a modular.”


4 comments
The Affair liked this Article on twitter.com.
𝟦𝘓𝘎𝘖𝘙𝘐𝘛𝘏𝘔𝘐𝘊 liked this Article on twitter.com.
Liam Flanagan liked this Article on twitter.com.
Bill Scherer liked this Article on twitter.com.